Yellowfin Tuna
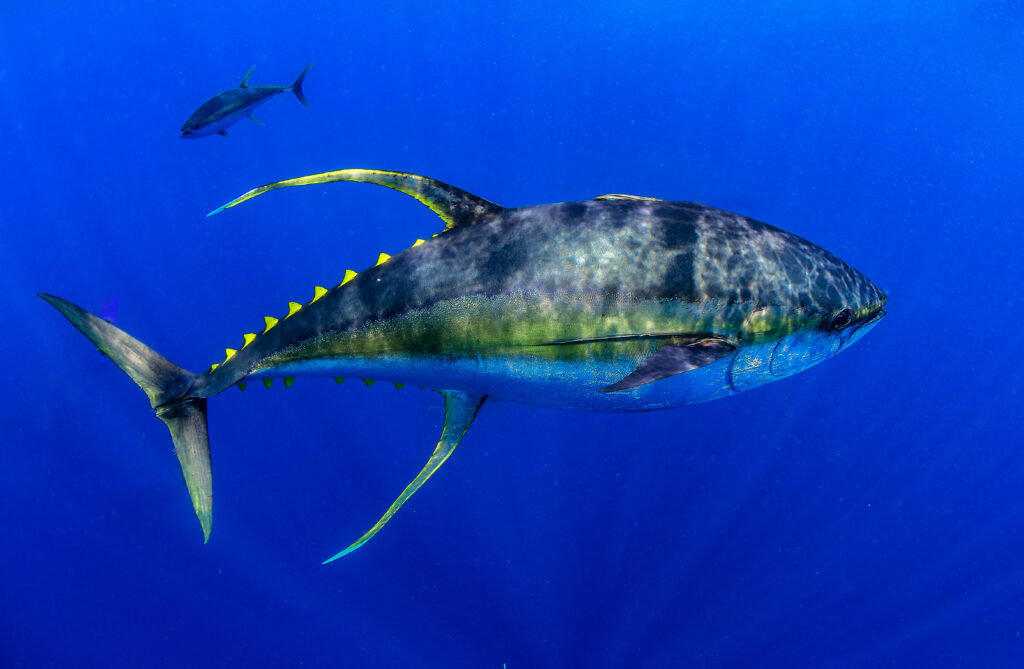
Yellowfin Tuna are found globally, highly migratory and a popular fish for recreational anglers for their incredible tasting meat and game fishing qualities.
In the Pacific Ocean, the yellowfin range of distribution has been generally reported to stretch from 40°N to 40°S, with the northward spread of the species being slightly more pronounced in the western than in the eastern Pacific.
Lifespan


Where do they go to breed?
Yellowfin reach spawning maturity at 2 years of age and spawn in both tropical and subtropical waters all year round, but most frequently in the summer months.
Interestingly, spawning occurs during the night and a single female can produce 0.2-8 million eggs per spawning event.
Catch
One of the main considerations when catching yellowfin is that they are predominantly caught in warmer water temperatures than other tuna species such as Southern Bluefin and Albacore. This makes keeping the fish cool more critical to either ensure it a better chance of survival upon release or quality meat on your plate.
Preparation
The old saying that preparation prevents poor performance could not be more true when it comes to ensuring the fish will be either great quality on your plate or a better chance of release.
It can be as simple as:
- Ensuring the relevant equipment is handy and nearby
- Having a plan before you take to the water
- Expect to keep a fish even if you plan on releasing. This will ensure you have all of the necessary equipment in the case of an incidental mortality (ice, ike jime kit, chill bag).
- Knowing your limits and how much fish you can store and maintain quality.
Why minimise fight time?
Quickly retrieving a fish to the boat means the fish experiences less stress.
When we exercise, lactic acid and stress hormones accumulate in the blood and muscle tissue.
This happens in fish too, but it doesn’t just reduce the eating quality of the flesh, it slows down its recovery time if you release it after a long fight time.

How do we minimise the fight time?
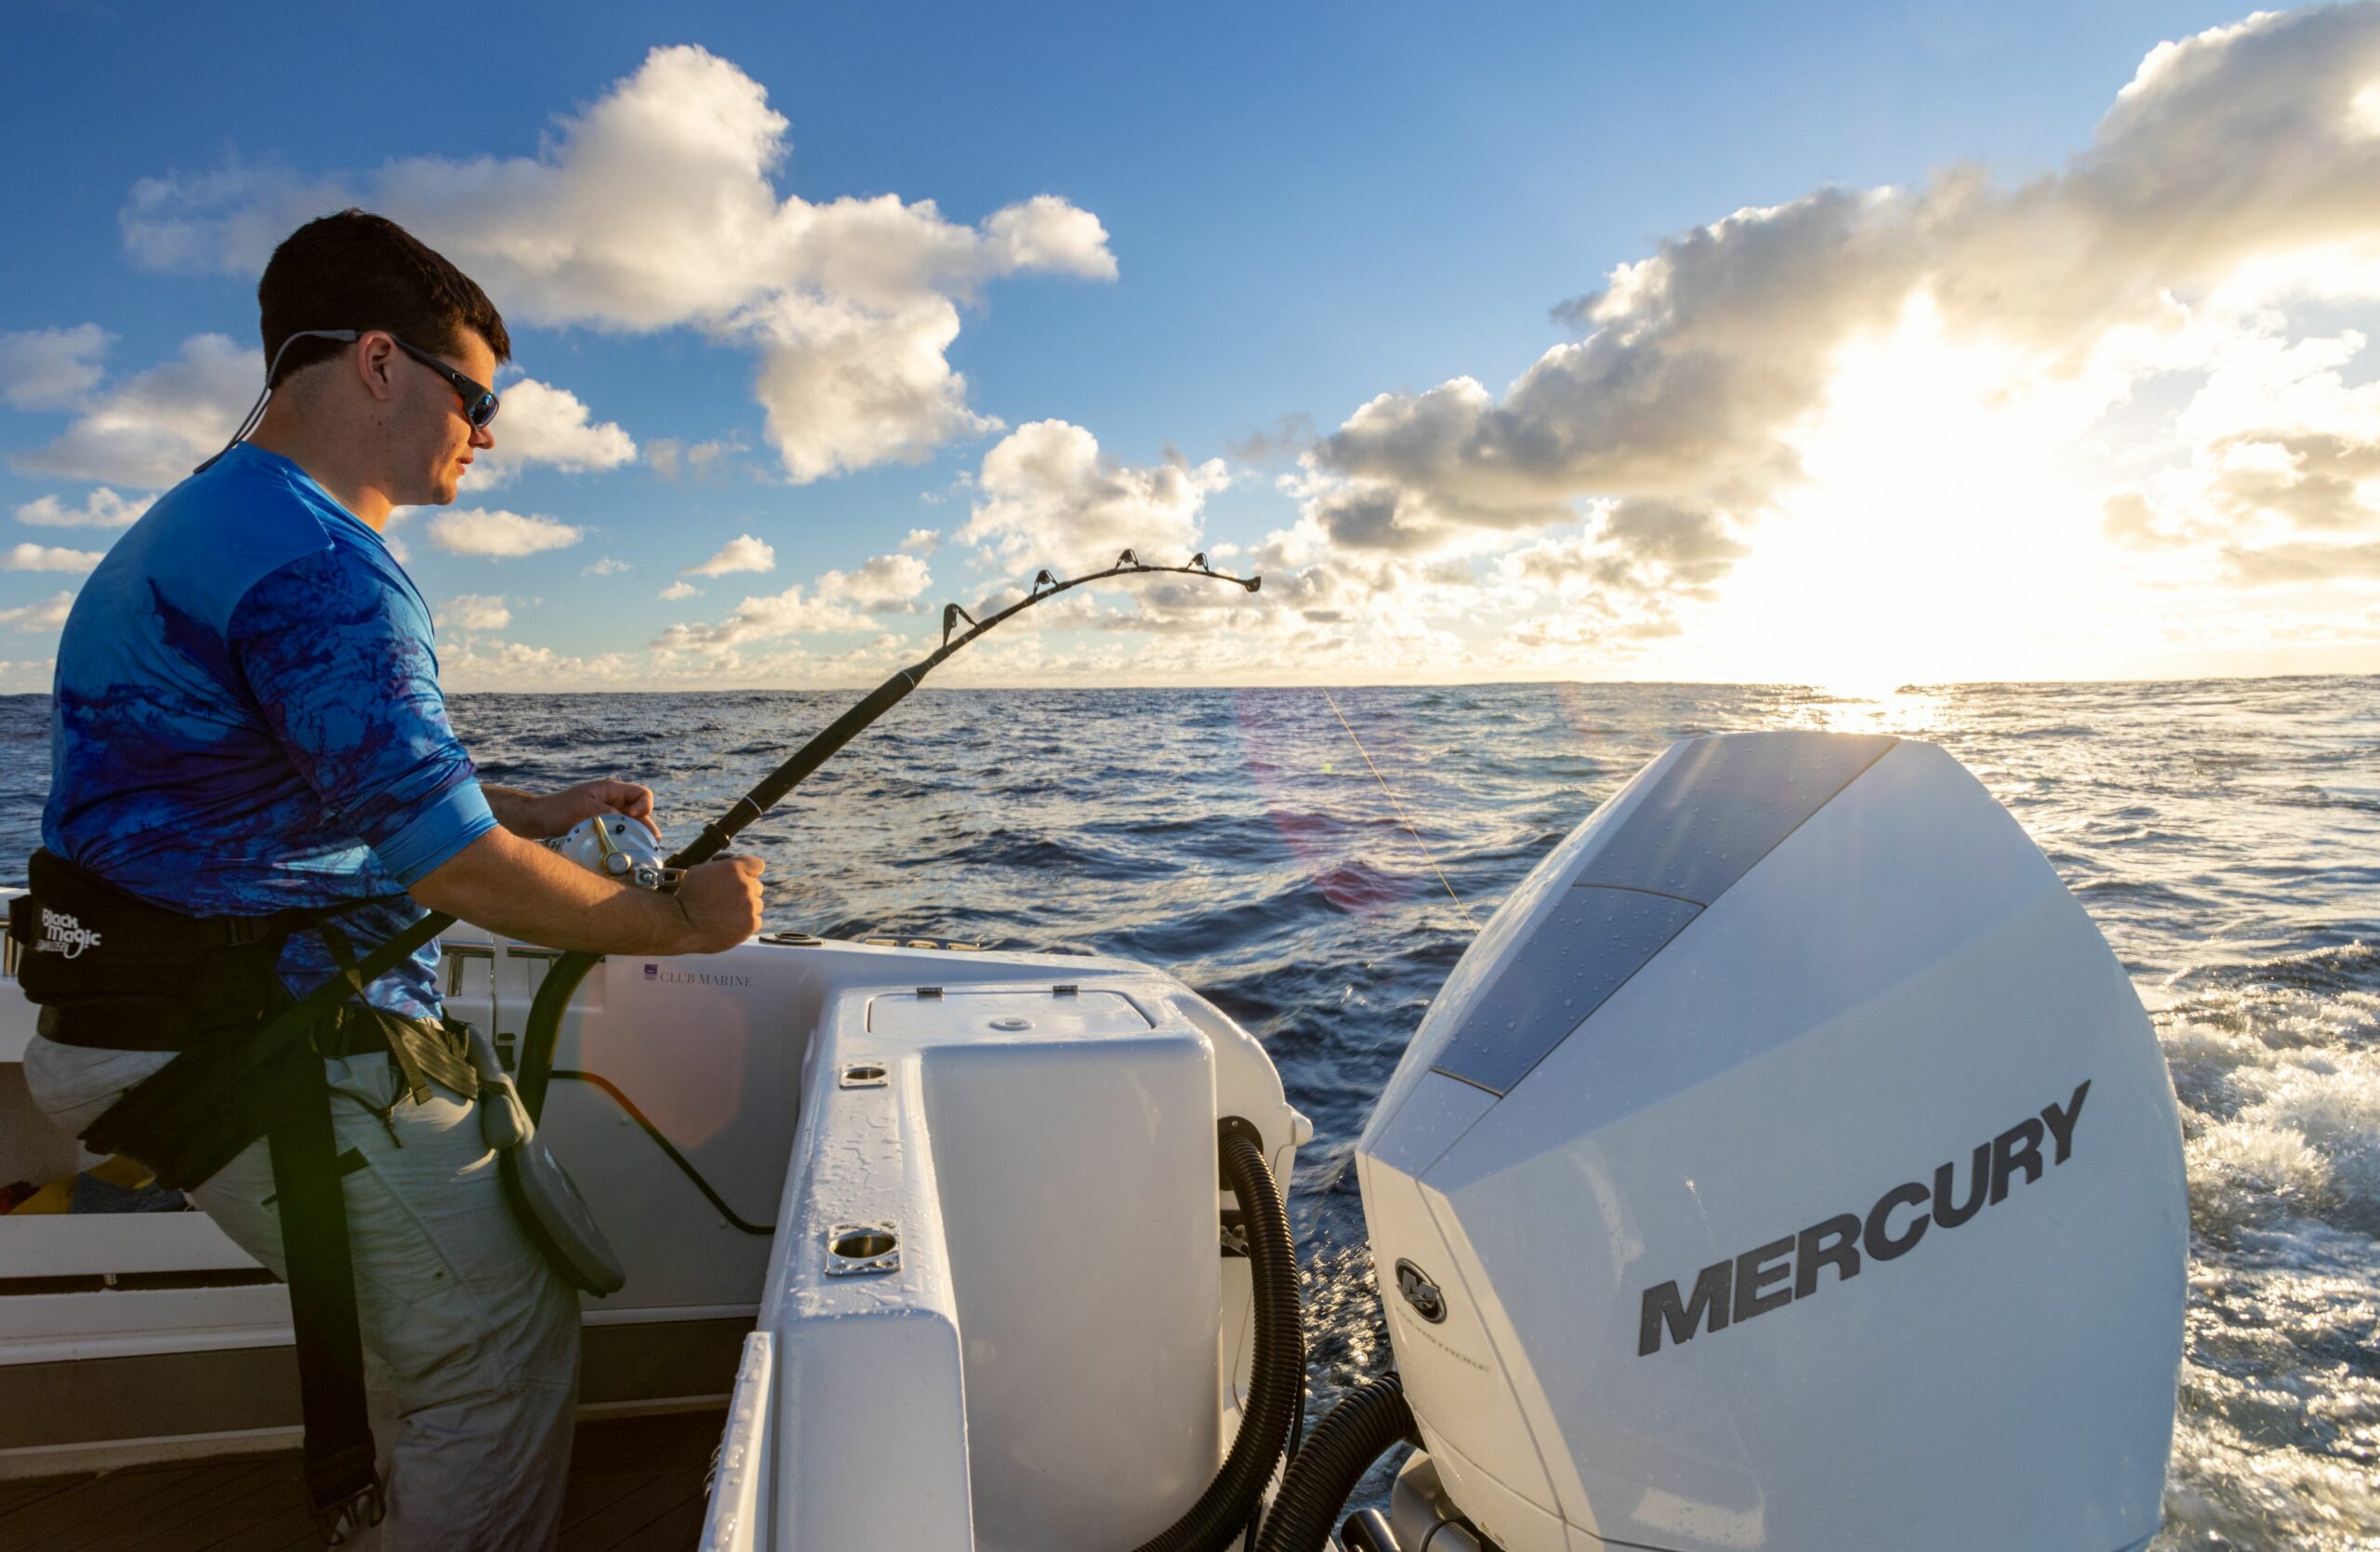
Fight time can be reduced by using a heavier line class, buying a good quality rod and reel that is up to the job, and knowing about better fishing techniques.
Using heavier line is the best way to reduce fight times for smaller SBT. For larger fish, a combination of a heavier line and angling-boat driving experience is required. For any large fish, a gimbal and harness is essential to help you control the rod and reel.
Experience
There are many experienced game fishers who can give you tips on improving fishing techniques, and tunachampions.com.au has links to some good instructional videos.
Joining a fishing club associated with Game Fishing Association Australia (GFAA) is also a great way to meet experienced anglers and access information on responsible fishing practices.
Preparation
The old saying that preparation prevents poor performance could not be more true when it comes to ensuring the fish will be either great quality on your plate or a better chance of release.
It can be as simple as:
- Ensuring the relevant equipment is handy and nearby
- Having a plan before you take to the water
- Expect to keep a fish even if you plan on releasing. This will ensure you have all of the necessary equipment in the case of an incidental mortality (ice, ike jime kit, chill bag).
- Knowing your limits and how much fish you can store and maintain quality.
Why minimise fight time?
Quickly retrieving a fish to the boat means the fish experiences less stress.
When we exercise, lactic acid and stress hormones accumulate in the blood and muscle tissue.
This happens in fish too, but it doesn’t just reduce the eating quality of the flesh, it slows down its recovery time if you release it after a long fight time.

How do we minimise the fight time?
Fight time can be reduced by using a heavier line class, buying a good quality rod and reel that is up to the job, and knowing about better fishing techniques.
Using heavier line is the best way to reduce fight times for smaller SBT. For larger fish, a combination of a heavier line and angling-boat driving experience is required. For any large fish, a gimbal and harness is essential to help you control the rod and reel.
Experience
There are many experienced game fishers who can give you tips on improving fishing techniques, and tunachampions.com.au has links to some good instructional videos.
Joining a fishing club associated with Game Fishing Association Australia (GFAA) is also a great way to meet experienced anglers and access information on responsible fishing practices.
Handle
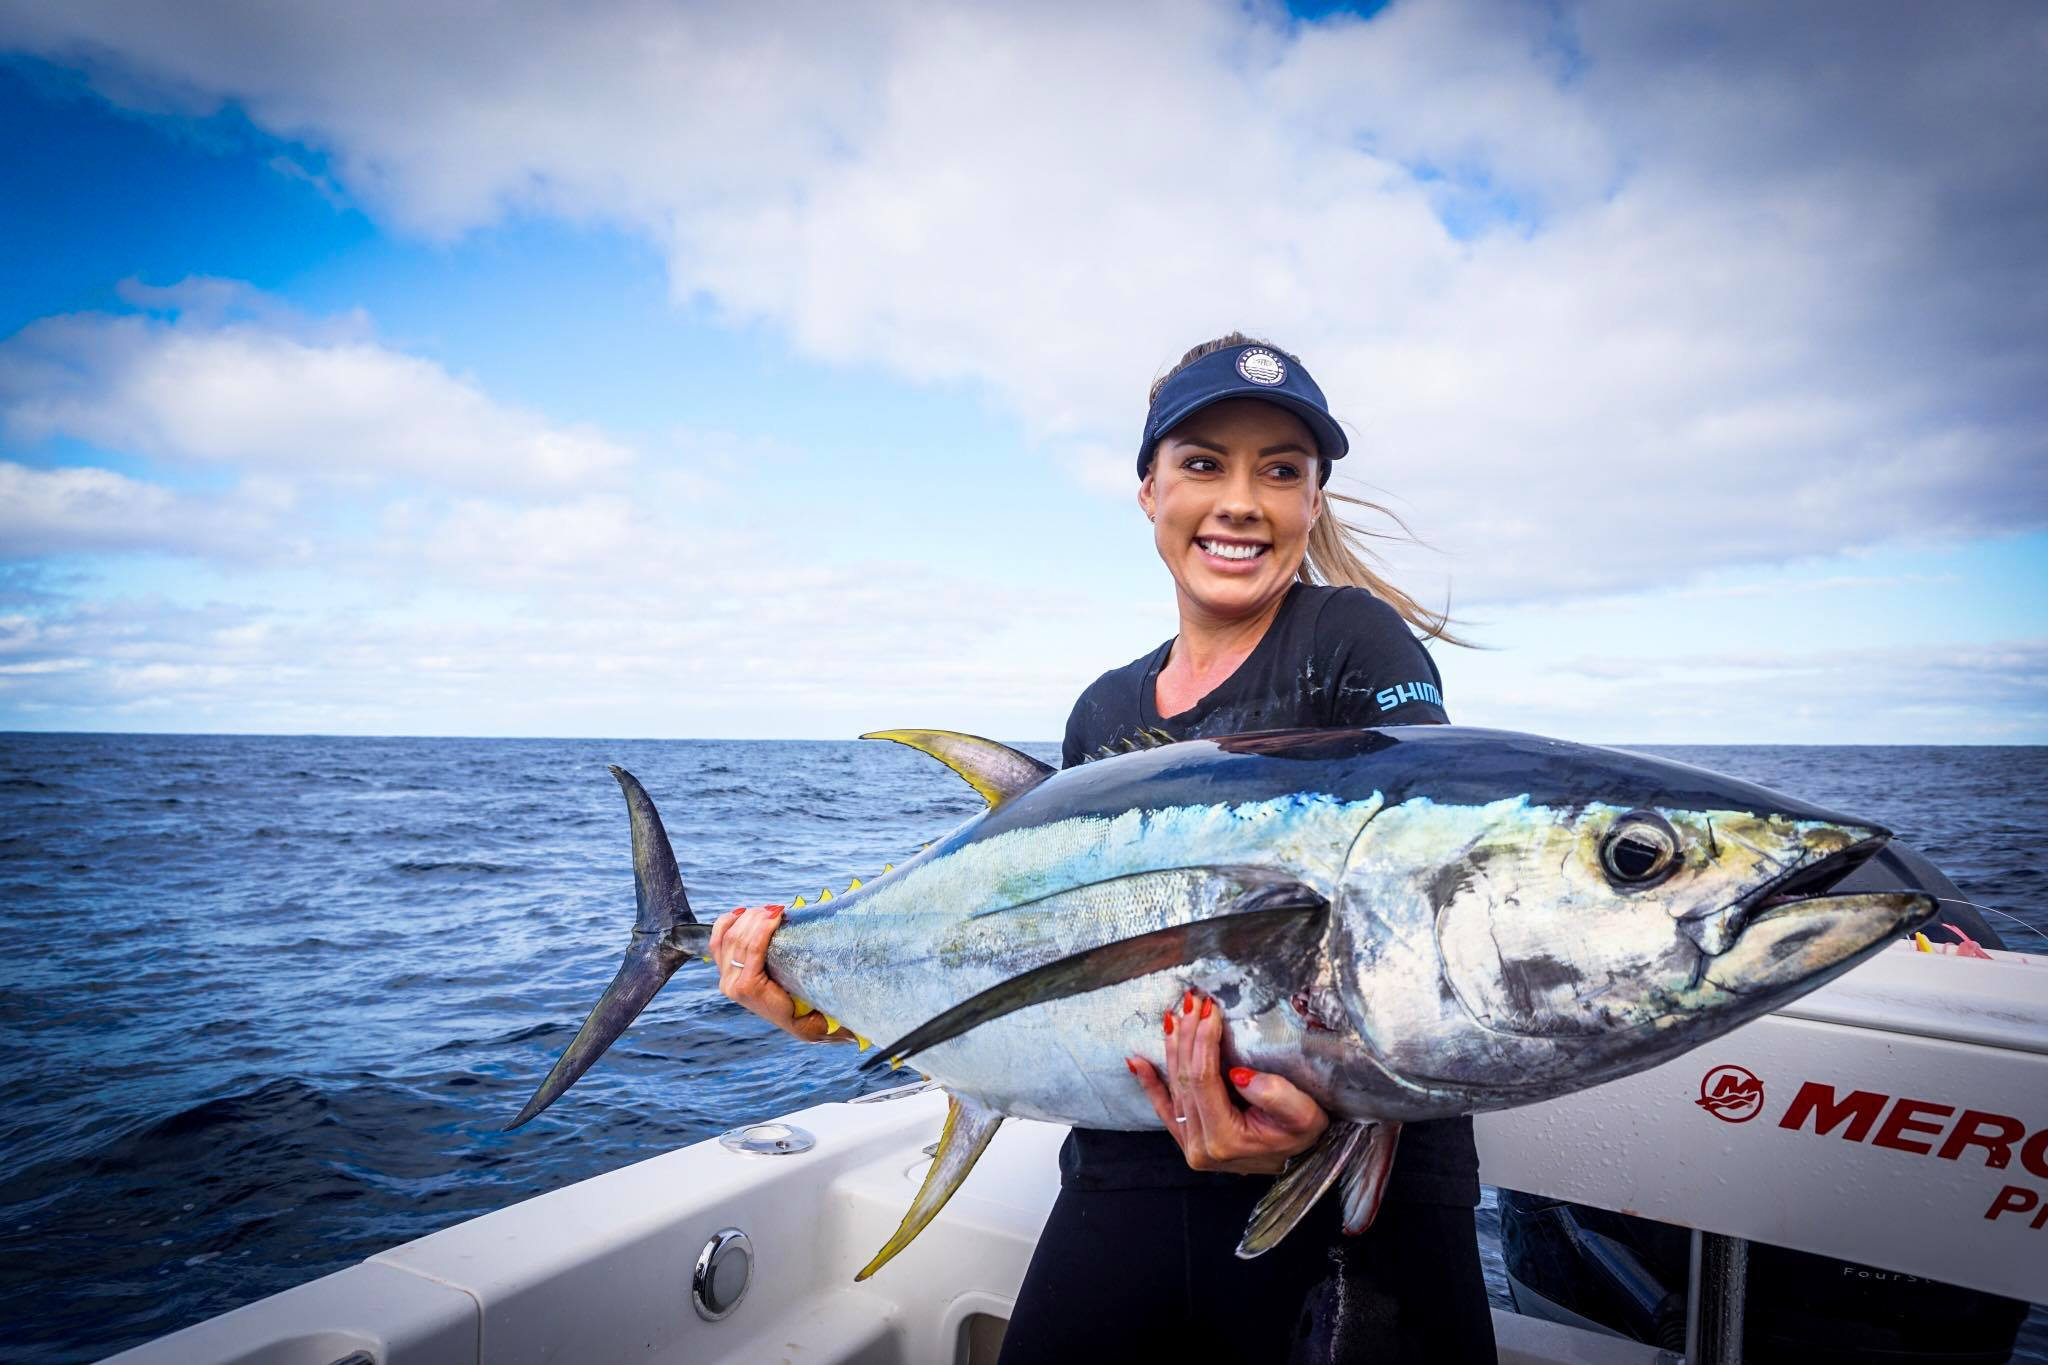
Whether you plan to retain or release a fish, it is important to consider how you handle it. Poor handling techniques can affect the welfare of the animal, reduce its chance of survival if released, and affect flesh quality if you plan to keep it to eat.
Bringing the fish onboard
Things to keep in mind:
- Making sure anything touching the fish is wet, whether this is the net, your gloves or bare hands it will reduce the chance of removing slime from the fishes skin. This slime protects the fish from bacteria.
- Using a knotless landing net to support the fishes body weight
- Cradling the fish when holding rather than grabbing them by the tail, will prevent spinal damage.
- Resting them on a wet foam matt to prevent damage to the meat
- A wet towel over the eyes to minimise stress
Release
If possible, all handling should be done with the fish remaining in the water and water flowing over their gills.
Keep the fish wet
If possible, all handling should be done with the fish remaining in the water and water flowing over their gills.
Most fish have the capability of moving their gills to breathe, however, tuna use ram ventilation which means they cannot pump their gills, they must have water movement through their mouth and over their gills.
Tagging
If you’re inserting a tag:
- The tag should be inserted between the rays just below the second dorsal fin and high on the shoulder pointing towards the tail on a 45o degree angle.
- This allows the tag to lock like an anchor in the busal rays and improves the chances of the tag remaining in the fish.
- Make sure you complete the relevant documentation with the tag so you help scientists understand more about the species.

Boatside
Once the fish is boatside the fish can either be controlled on the leader or using a pair of lip grips. Using a fixed gaff in the mouth creates another hole the fish must repair.
Therefore, boatside ideally removing the hook using a dehooker whilst the vessel is in gear will aid in the chances of the fishes survival. If the hook cannot be removed, cutting the leader as close to the hook is the next best thing. If the fish is losing colour or lacking a tailbeat, swimming it for sometime before releasing it may help revive it without it having to exert energy upon release to swim.


Onboard
Make sure the tuna is gently placed back into the water rather than speared headfirst.

Keep the fish wet
If possible, all handling should be done with the fish remaining in the water and water flowing over their gills.
Most fish have the capability of moving their gills to breathe, however, tuna use ram ventilation which means they cannot pump their gills, they must have water movement through their mouth and over their gills.
Tagging
If you’re inserting a tag:
- The tag should be inserted between the rays just below the second dorsal fin and high on the shoulder pointing towards the tail on a 45o degree angle.
- This allows the tag to lock like an anchor in the busal rays and improves the chances of the tag remaining in the fish.
- Make sure you complete the relevant documentation with the tag so you help scientists understand more about the species.

Boatside
Once the fish is boatside the fish can either be controlled on the leader or using a pair of lip grips. Using a fixed gaff in the mouth creates another hole the fish must repair.
Therefore, boatside ideally removing the hook using a dehooker whilst the vessel is in gear will aid in the chances of the fishes survival. If the hook cannot be removed, cutting the leader as close to the hook is the next best thing. If the fish is losing colour or lacking a tailbeat, swimming it for sometime before releasing it may help revive it without it having to exert energy upon release to swim.


Onboard
Make sure the tuna is gently placed back into the water rather than speared headfirst.
Keep
Some things are just best served cold, revenge, beer and tuna. As fishers we need to be conscious when catching and dispatching tuna that their bodies continue to warm.
Remember the water may be warm, so efficiency is key
Why
Some things are just best served cold, revenge, beer and tuna. Most fish species are ectotherms, this means the temperature of the water regulates where they can inhabit or swim.
However, there are a small number of fish that are known as endotherms and they have the ability to control their internal body temperature, meaning they can swim across a wide range of water temperatures.
These species are usually highly migratory and include tuna, some sharks and billfish. Because of this unique ability to elevate their body temperature, it means as fishers we need to be conscious when catching and dispatching tuna that their bodies continue to warm.
- Making sure anything touching the fish is wet, whether this is the net, your gloves or bare hands it will reduce the chance of removing slime from the fishes skin. This slime protects the fish from bacteria.
- Using a knotless landing net to support the fishes body weight
- Cradling the fish when holding rather than grabbing them by the tail, will prevent spinal damage.
- Resting them on a wet foam matt to prevent damage to the meat
- A wet towel over the eyes to minimise stress
Ike Jime Process
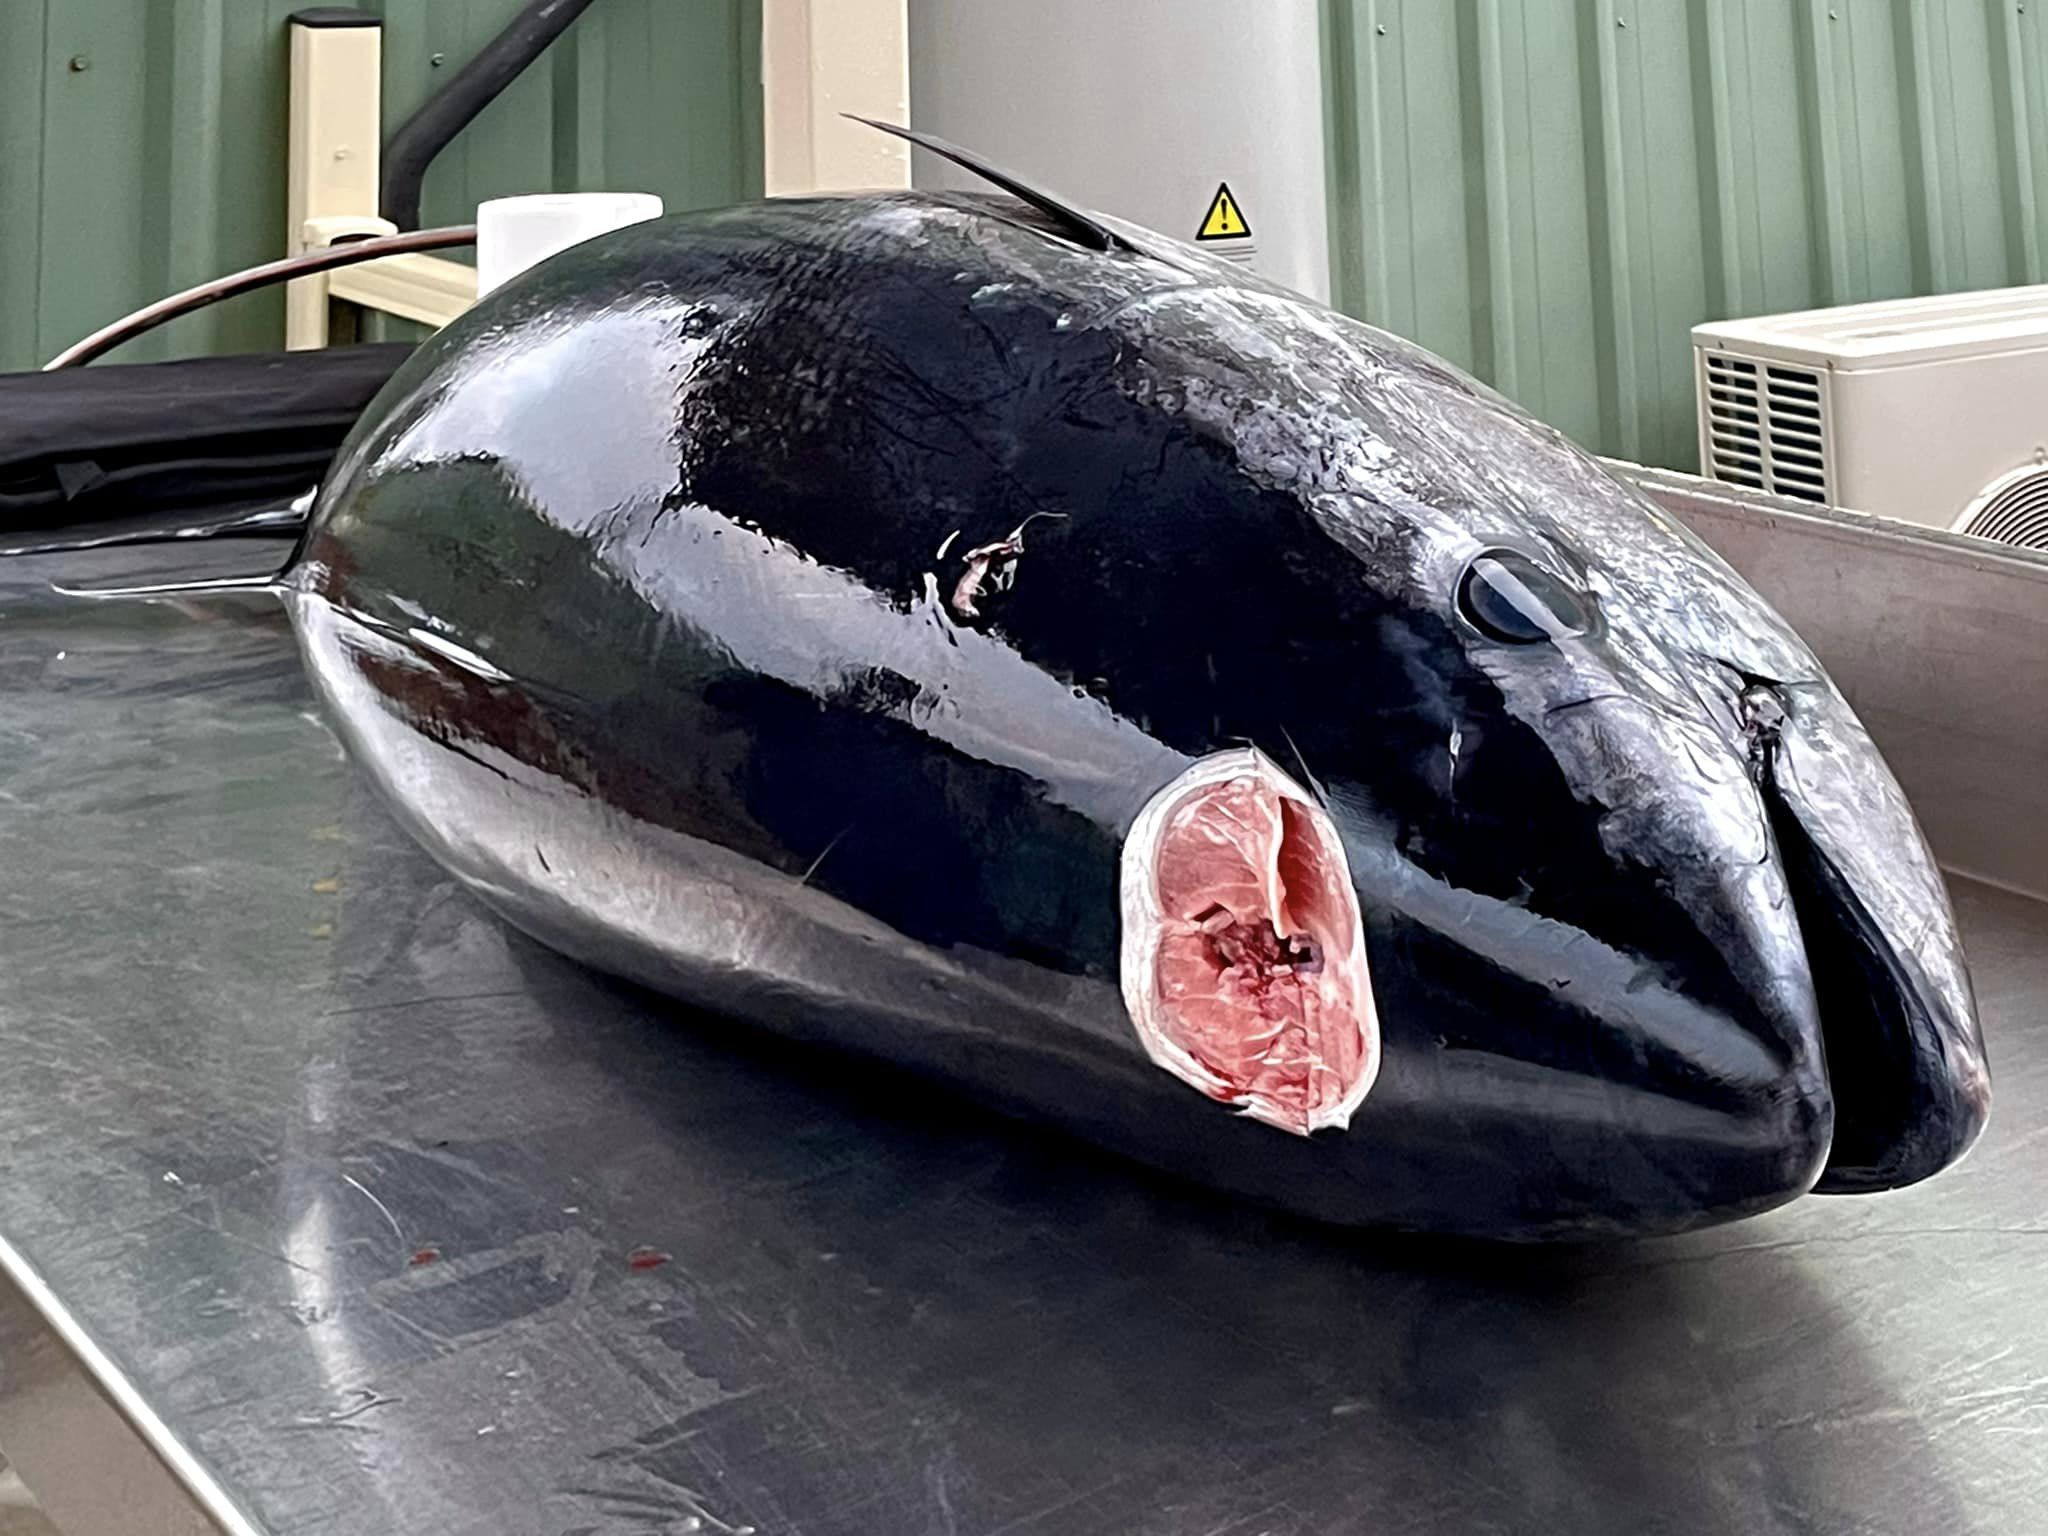
Brain spike: Spiking is a quick and humane way of dispatching a fish and the first step to the Ike Jime process.
Some things to keep in mind:
- You’re aiming for the soft circle in between the eyes and the spike should enter the center of this circle and be inserted until the end of the spike reaches the same level as the eyes.
- Move the spike once it has reached eye level to ensure you destroy the cranial cavity.
- Avoid using a knife as your hand may slip which could cause a bad injury.
- A screwdriver will work as a brain spike if you do not have the correct tool.
Bleeding
Bleeding a fish will ensure the meat has flavour and isn’t to rich as well as moving unnecessary mass, meaning a quicker cooling process.
How to do this:
- Make a cut behind the pectoral fins on both sides.
- Make sure the incision is a maximum of 2-3cms deep, any deeper than this and the blood will run back into the meat, undoing the bleeding process.
- This is because the artery is directly under the surface of the skin.
- Pressure bleeding is another option, however if you are not familiar with the process this should be avoided as you can flood the meat with saltwater.
Pithing
Even after a brain spike a tunas nerves will continue to twitch casuing the muscles to react and generate heat. To prevent the muscles from creating heat, running a wire down the spinal column will destroy the spinal cord, stopping these reactions and heat production.
How to do this:
- Using a knife or a coring tool, cut a wedge out around the spiking entrance.
- This will open up the the entry point to the spinal cord.
- Run a thick cord, or wire down the spinal cord to the end of the tail to deactivate the nerves.
Tip: you will see the fish twitch as the cord is passing through the column, when it reaches the end, the meat will relax and soften.

Gut and Gill
Gutting and gilling not only removes the components wihtin a fish that have the cpaacity to cause spoilage, but it also removes mass from the fish allowing the cooling process to be moree effective.
How to do this:
- Traditional method of making an incision along the centre of the stomach and removing the guts from the cavity and cleaning it with saltwater. Then remove the gills by lifting the plate and cutting them away from the head.
- To keep a fish whole you can actually make a small circle incision around the intestine and cut this away from the skin, than gill using the traditional methods and pull the gills. As you pull the gills the guts will come out as one piece with the gills leaving a whole gutted and gilled fish.

Chilling
When we say tuna heat, they heat so intensely they actually will actually cook from the inside out, which is called burnt tuna syndrome and results in a brown flesh.
A study conducted in 2017 looked at the body heat of tuna and the time it takes to reduce their internal body temperature after a fight.
To do this, a 35kg Southern Bluefin Tuna was caught using a rod and reel in 16°C water and the internal body temperature was measured immediately and was 27°C.
The fish was then placed in a saltwater ice slurry for 6 hours.
Go on take your guess, you think we got the core temperature to 0? Guess again! After being in a -1°C slurry the fishes core temperature was still 13°C. This fish was only 35kg in size, imagine chilling a 100kg barrel!
Things to keep in mind when chilling fish:
- Let the fish cool and chill for a 48 hour period before processing. This will allow the proteins to set in the meat.
- A saltwater slurry should use the ratio of 1kg of ice to 1kg of saltwater.
How much ice do I need?
- The rough rule is 1kg of ice to 1kg of meat, I know right now you’re thinking how in the world am I meant to carry 100kgs of ice onboard. Well, you’re not.
- The common misconception is that you come in from your days fishing and begin the filleting process. But, to get the best quality meat leaving your fish chilling for up to 48 hours allows the meat to set, making it easier to fillet and also drops the core temperature to near 0°C.
- This is where the 1:1 rule with ice comes into play, as that is the amount of ice required over the 48-hour period to be continually added to the slurry, as the fish will melt the ice through body heat.
- Or, when on land, befriend a mate who has a cool room! 1:1 is also the ratio of ice to saltwater when making a slurry, this will maximise the chilling potential of the slurry.
Use our calculator below to work out how much ice you need for your fish:
Prepare
Tips on how to minimise wastage
Minimise wastage
60% is the magical number and it is the minimum amount of yield you should get from a tuna. If you fillet well and remove cuts such as the shoulders, belly, cheek meat and the thin meat attached to the ribs this will get you approximately 60kgs of meat from a 100kg fish.
But why stop there, here’s some other things you can use the remainder of the fish for:
- Frames can be used for garden fertiliser
- Tuna skin can be dehydrated and made into dog treats
- Collars and jouls can be used for soups, broths

